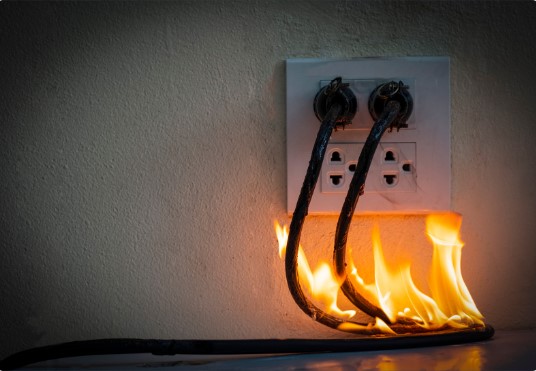
The wiring in our homes is incredibly important for both our safety and the proper functioning of our living spaces. It’s crucial that we regularly inspect and maintain our house wiring to ensure it’s in top-notch condition. Luckily, there’s a handy tool called a multimeter that can help us identify any faults in our wiring system. In this article, we’ll walk you through a simple and easy-to-follow guide on using a multimeter to detect these faults in your house wiring. By doing so, you’ll be able to pinpoint and tackle any potential hazards before they escalate into significant issues. Step 1: Getting Started with a Multimeter Before diving into the process of finding faults in house wiring using a multimeter, it’s important to understand the basics. A multimeter is a versatile tool that measures voltage, current, and resistance. It consists of various settings and probes to help you perform accurate measurements. Familiarize yourself with the different components of a multimeter, such as the display, dial, and probes, as this knowledge will be crucial throughout the fault-finding process. Step 2: Preparing for the Fault-Finding Process In order to guarantee a smooth and secure fault-finding procedure, it is absolutely essential to take the appropriate precautions. Begin by shutting off the power supply to the specific area of the house that you will be focusing on. This important step serves to prevent any potential accidents or electrical shocks. After that, gather together all the necessary tools for the task at hand. These should include a multimeter, spare fuses, wire strippers, electrical tape, and a notepad for documenting your discoveries along the way. Step 3: Testing for Faults Now that you are ready to begin testing, it’s important to know which faults to look for. Common issues in house wiring include loose connections, damaged insulation, and faulty circuits. Begin by visually inspecting the wiring for any obvious signs of damage, such as frayed wires or burn marks. Once the visual inspection is complete, use the multimeter to identify specific faults. Start by setting your multimeter to the voltage testing mode and test each outlet in the area for the presence of voltage. If a particular outlet shows no voltage, it may indicate a faulty connection or a tripped circuit breaker. Additionally, check for continuity by setting your multimeter to the resistance mode and testing the continuity of each wire. A lack of continuity suggests a break or disconnection in the wire. To locate potential short circuits, switch your multimeter to the continuity mode and test the wires by touching the probes together. If the multimeter emits a continuous beep, it indicates a short circuit. Similarly, test for insulation faults by setting the multimeter to the resistance mode and measuring the resistance between the wire and the ground. Unusual resistance values may indicate a compromised insulation. Step 4: Troubleshooting and Fixing Faults Once you have identified the faults, it’s time to troubleshoot and rectify the issues. Loose connections can often be
Continue readingHow to Find Faults in House Wiring with Multimeter